This blog covers the testing and fault finding of starter motor electrical problems for all Piaggio/ Gilera 50cc 2-stroke mopeds.
This guide can largely be applied to most other mopeds from different manufacturers, however the low current circuit operating the starter relay is slightly different for other manufacturers.
For example whereas the Piaggio scooters in this blog operate the starter relay by switching the +ve supply and having a permanent earth, Yamaha mopeds switch both the negative (with the starter button) and the positive (with the brake light switches). This should be kept in mind where the guide is used on scooters other than Piaggio/ Gilera 2-stroke 50cc mopeds.
How the starter motor circuit works...
The wiring system for moped starter motors can be considered and tested as 2 separate circuits.
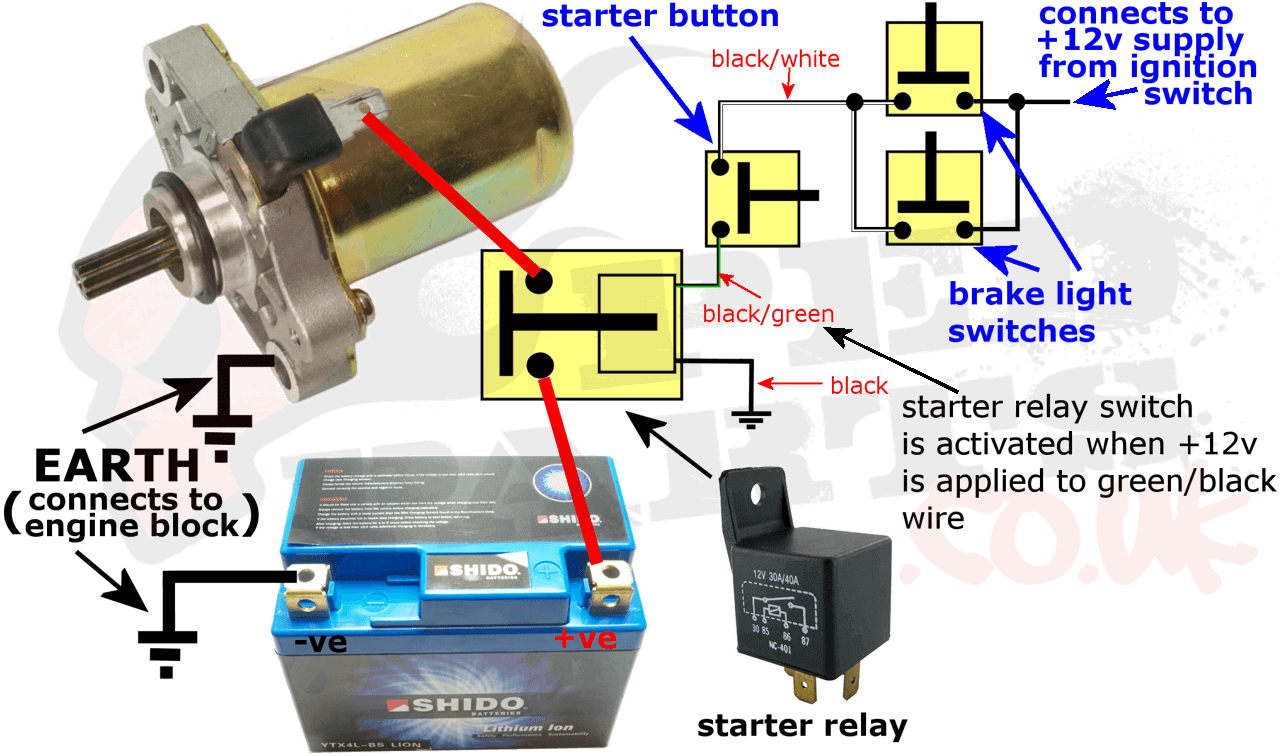
1) The high current circuit: This consists of the thick wires which run directly from the battery to the starter motor +12v terminal (red wire) and starter motor ground (black wire). The black ground wire connects directly from the battery -ve terminal to either the starter motor body or to the engine block to which the starter motor is electrically connected through its mounting bolts.
The red wire connects from the battery +ve terminal to the starter +12v terminal through a relay which is simply an electrically operated switch. The relay simply joins the red wires together (starter operates) when 12 volts is applied to it.
Why do we need a relay for this? Because the starter motor uses a lot of power (approx 50amps). If you didn't have the relay you would need to run long thick wires up to the starter button and you would need an extremely substantial switch (something like a cooker switch!) otherwise the switch would quickly burn out under 50amps load.
By using the relay the high current circuit can be kept as short as possible for reasons of safety (the high current circuit is not fused), cost, electrical efficiency and practicality.
How does the relay work? The relay has a small electrical magnet inside. When 12 volts is applied to the relay it magnetically closes the switch which joins together the thick red wires from the high current circuit to operate the starter.
2) The low current circuit: This is the circuit which determines whether or not 12 volts is sent to the relay which then switches on the high current circuit and operates the starter.
This circuit will only activate the relay if...
1) the ignition is on 2) the brake light is on 3) the starter button is pushed.
click to enlarge...

_______________________________________________________________________
Step by Step Fault Finding Process...
Section 1 involves testing the high current circuit. Only move on to section 2 after completing section 1.
Read through everything first and DO NOT attempt if you do not feel completely confident you know what you are doing!
Section 1: High current circuit and battery
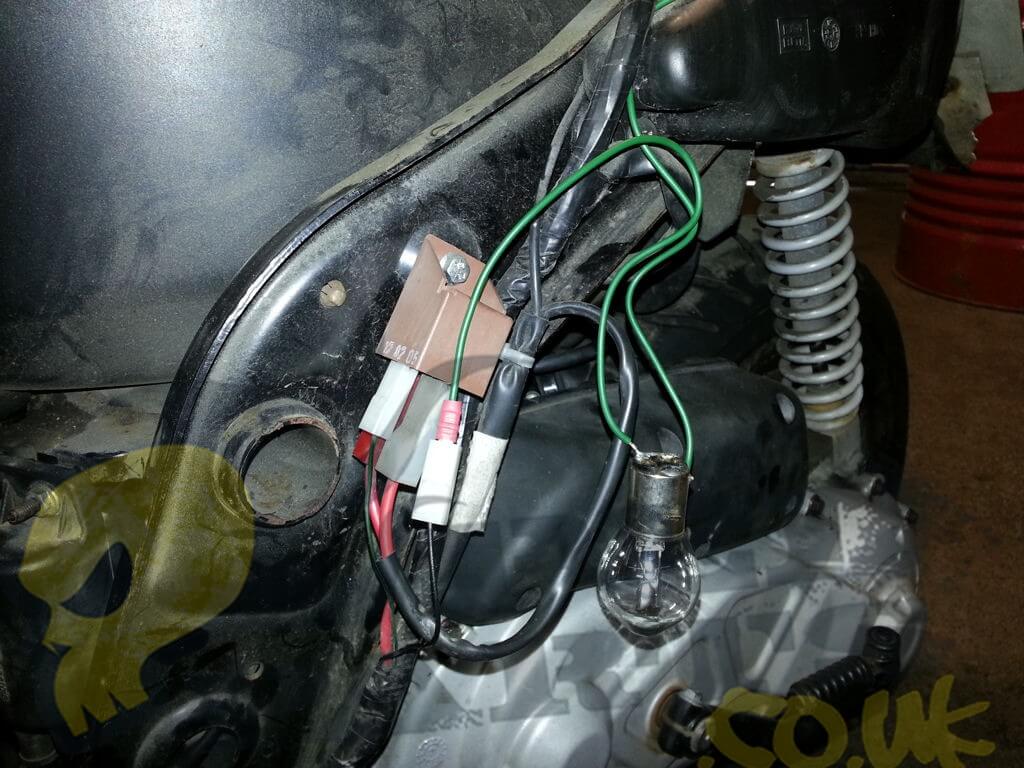
- 1) Locate the starter relay. The moped in the following pictures is a Gilera Stalker which locates the starter relay behind the left hand rear panel. It is sometimes located elsewhere on different models of Piaggio/ Gilers scooters. If you get stuck follow the thick red wire from the battery, it goes straight to it! The starter relay is the component (normally brown for Piaggio) shown in the next photo down the page.
- 2) Unplug the 2 thick red wires from the starter relay and join them together with something suitable like spade connectors or bridge them with a piece of thick wire. Don't allow the red wires to touch anything else including the scooter frame. There is a high current flowing when the starter motor is operating so join the wires firmly and deliberately otherwise they may spark or get hot. If the starter motor turns over normally then the high current circuit is fine and you can move straight on to Section 2: Low current circuit testing, otherwise continue to step 3)
- 3) Testing the battery: Ideally replace your battery with a known good fully charged battery which you have seen working on another bike. If you can't do this you can connect your battery with jump leads to a car battery. Be careful! Connect +ve to +ve and -ve to -ve. DO NOT run the car engine if you do this. If the car engine is running the car battery voltage will increase and your moped will try to regulate it down which is likely to damage your voltage regulator. If you can't do either of these you either need to test your own battery in someone else's moped or just buy a new one. They aren't expensive. Once you've done whichever of these options is most convenient (check all battery connections are good and tight) repeat the test in step 2) again. If the engine now turns over correctly you need to replace the battery and then start the testing over from the beginning if still necessary.
If the starter still does not operate correctly move onto step 4)
- 4) Connect a jump lead from the battery -ve terminal directly to the starter motor metal body and repeat steps 2) and 3). If the starter now operates with this jump lead but not without it, this indicates a problem with the thick black earth cable which runs from the battery -ve terminal to the engine casing. Make sure it is connected securely, not corroded, and restart the testing from the beginning, otherwise move on to step 5)
- 5) Remove the starter motor from the engine and connect it directly to your known good battery source from step 3) with jump leads. Connect the battery -ve terminal to the starter metal body and the starter connection terminal (normally a spade connector) directly to the battery +ve terminal. Be careful! The starter motor will try to jump out of your hands if it operates, secure it suitably in a vice. Be very careful not to short out the cables. If the starter motor still does not operate it will need to be replaced. They are not cost effective to repair.
- 6) Reassemble everything and go back to step 2). The starter motor should now be working when you carry out step 2)
Section 2: Low current circuit testing
only move on to this section after the starter motor is working when tested in step 2) in the previous section
- 7) Make sure all wires are reconnected and a 'good' battery source is connected as described in the previous section. Make sure the rear brake light is coming on when you pull the brake lever with the ignition on. If the brake light switches are not working the starter will not operate. Move on to the next step only once the brake light is working properly.
- 8) If the starter motor clicks when you try to start the moped AND the starter works when tested as described in step 2) above this means both the low current circuit and the high current circuit are working correctly and the starter relay internal contacts are damaged. Replace the starter relay, else continue to step 9)
- 9) The thin black wire going to the starter relay should be permanently connected to earth. Referring to the picture below test this by disconnecting the black wire from the starter relay and connecting it to a bulb.
click to enlarge...

Connect the other side of the bulb directly to the battery +ve terminal and check that it lights. It is not enough to test this with a multimeter, it must be tested with a load on it (e.g. the bulb). It does not matter if the ignition is on or off. If the bulb does not light the black wire is not earthed properly. It can be replaced by a wire directly connected to earth or a bare part of the scooter frame if necessary. Once you have made sure this wire is earthed move on to step 10)
- 10) Leaving one side of the bulb still connected to the thin black wire disconnect the thin green/black wire from the starter relay and connect it to other side of the bulb. Switch on the ignition and pull a brake lever (make sure the brake light comes on) and press the starter button. If the bulb glows this means the low current circuit is working correctly and since we already know the high current circuit to be ok then the starter relay is faulty and should be replaced. Otherwise continue to the next step.
- 11) We can now isolate the problem to being the green/black wire not supplying the +12v necessary to operate the relay. We can prove this by reconnecting the black wire to the relay and connecting a wire directly from the battery +ve terminal to the exposed terminal on the starter relay (the one the green/black wire was connected to). The starter motor will now operate if you have followed all steps correctly.
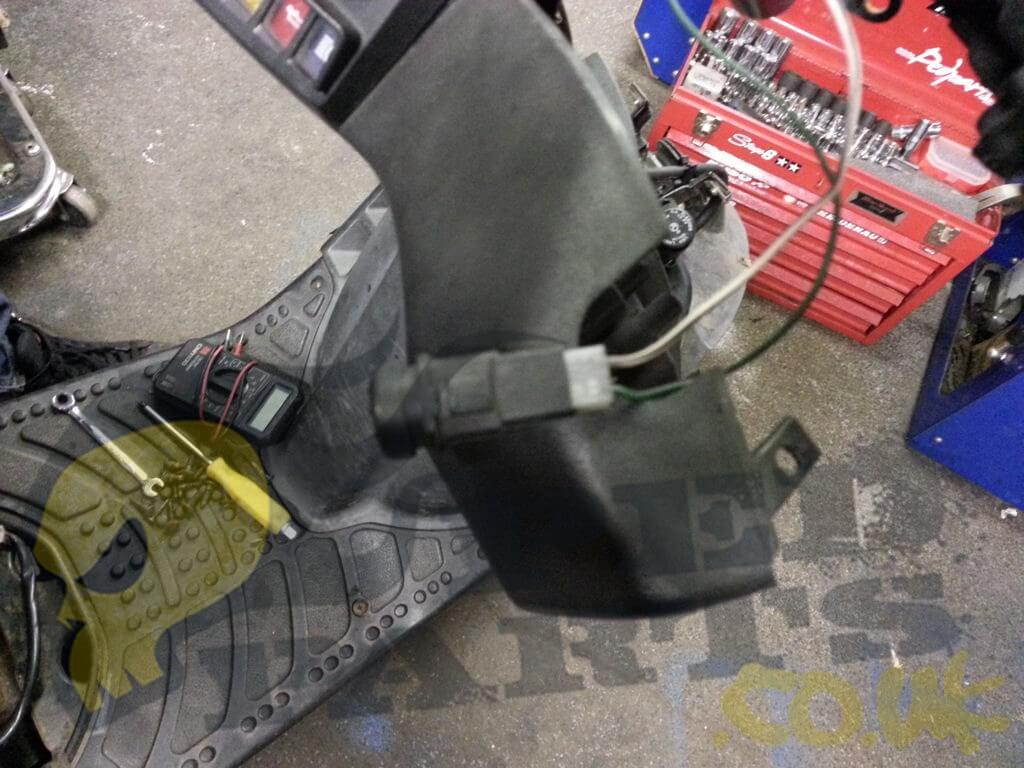
- 12) Fault finding the green/black wire: Remove the handlebar cover to expose the starter button as shown in the photo below.
click to enlarge...

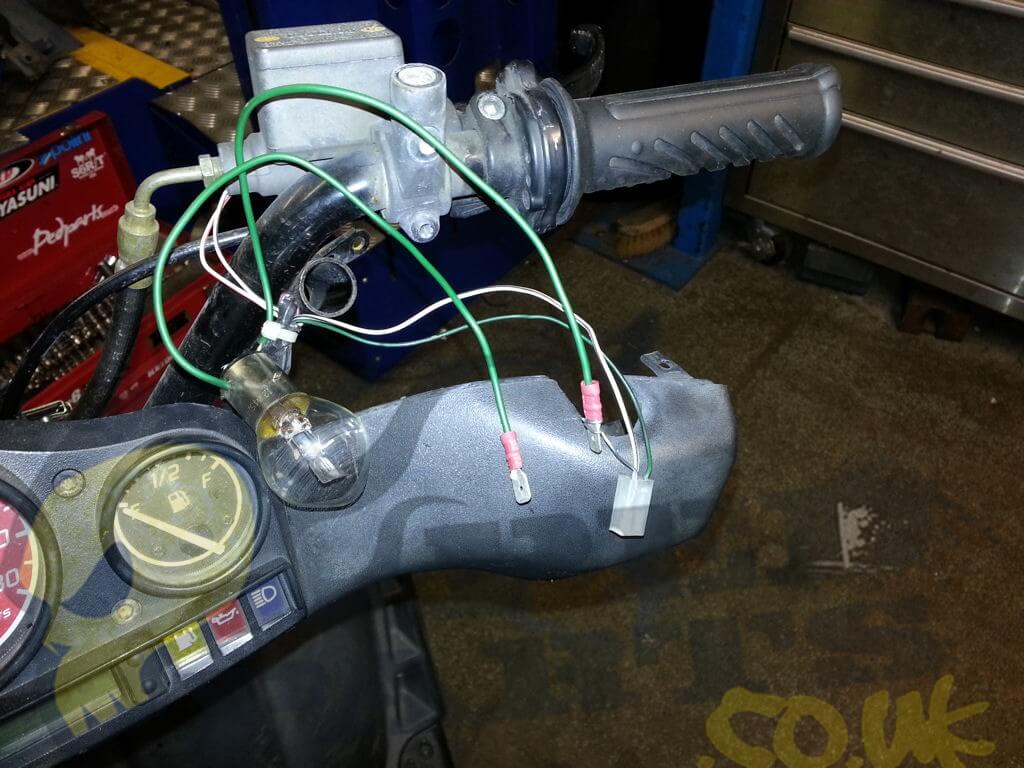
The white/black wire is the +12v supply from the brake lights switches. We know this is working because the brake light works. However you can test it anyway by connecting one side of our test bulb to it and connecting the other end to the battery -ve terminal.
click to enlarge...

The bulb should light every time the brake light operates. If it doesn't you can easily follow this wire back to the brake light switches where we know it works, but so long as the brake light is working this is unlikely to be a problem.
- 13) Once you've checked the bulb lights up in the previous step now connect the test bulb between the green/black wire on the starter button and leave the other side of the bulb connected to the battery -ve terminal. If the bulb does not light when the brake light is on AND you press the starter button then the starter button itself is faulty and should be replaced. If it does light then this means there is a break in the green/black wire between the starter button and where it connects to the starter relay (we have already tested the bulb at the starter relay end of the wire and know it not to work there). Rectify!
Please remember this guide only applies to Piaggio/ Gilera 2-stroke 50cc mopeds. We'll probably repost different versions of this guide at some point but slightly altered so as it applies specifically to different bikes e.g. Yamaha Aerox etc.